Monday, August 29, 2011

Tutorial: 5 Step Baby Car Seat Strap Covers


Car seat strap covers are so quick and easy to make! Plus you can make these a custom design by choosing your own fabric. It takes less than an hour to make, so get started! If you use two different fabrics, you've got yourself reversible strap covers. I have used this size of strap covers with my daughter's infant car seat and now with her convertible car seat. 


Steps

1. Cut out two 6"x6" squares of each fabric and two pieces of batting the same size. 

2. Put your fabrics right sides together with the batting on top or bottom (it doesn't matter). Sew these together with a 1/4" seam. Leave a 2" opening to turn inside out. 

3. Cut your corners & turn the square inside out.

4. Pin your opening and sew around the outside of the square still with a 1/4" seam. I started sewing at the beginning of the opening and then went over it again at the end as a form of double stitching/reinforcement. 

5. Cut 2 strips of velcro approximately 5" long. Sew those on one side to each side of the square by sewing around the perimeter of the strips. Here are my two strap covers showing a velcro strip on each side. Excuse the fact that my velcro strips aren't the same color, I ran out of the white velcro with my first strap cover! Who will really see it, right?? As a side tip, I put transparent thread on the top stitch so it wouldn't show on the velcro. White thread would work as well. 

You're all done! Enjoy your cute strap covers!

Monday, August 22, 2011

Quick-Tip: Rounding Corners


I wanted a rounded corner for a project. But how do you get rounded corners that all match? Use a paper plate! I folded all of my corners into the same spot, placed the paper plate down, and took a rotary cutter from one side to the other. You can also just mark this curve and then cut with scissors. That's it! 

Saturday, August 13, 2011

Quick-Tip: Preparing Fabric for Cutting


If you are interested in cutting your fabric straight (especially for strips), use this tip to help you do so:

First, fold your fabric in half with the salvage edges together, as well as the already cut edges from the fabric store. Line up the edges that have already been cut and don't worry about the salvage edges. 

 Now fold the fabric again and lay it over the top of your seams so you don't get distracted by it. 

Put your ruler over the fabric and line it up to make sure it is straight on either side. For example, in this picture I lined up the ruler at one inch on the top and half an inch on the bottom. No matter what, you'll want your fabric to be the same length from one side of the ruler to the other to show your fabric is straight. Go ahead and cut!


Monday, August 1, 2011

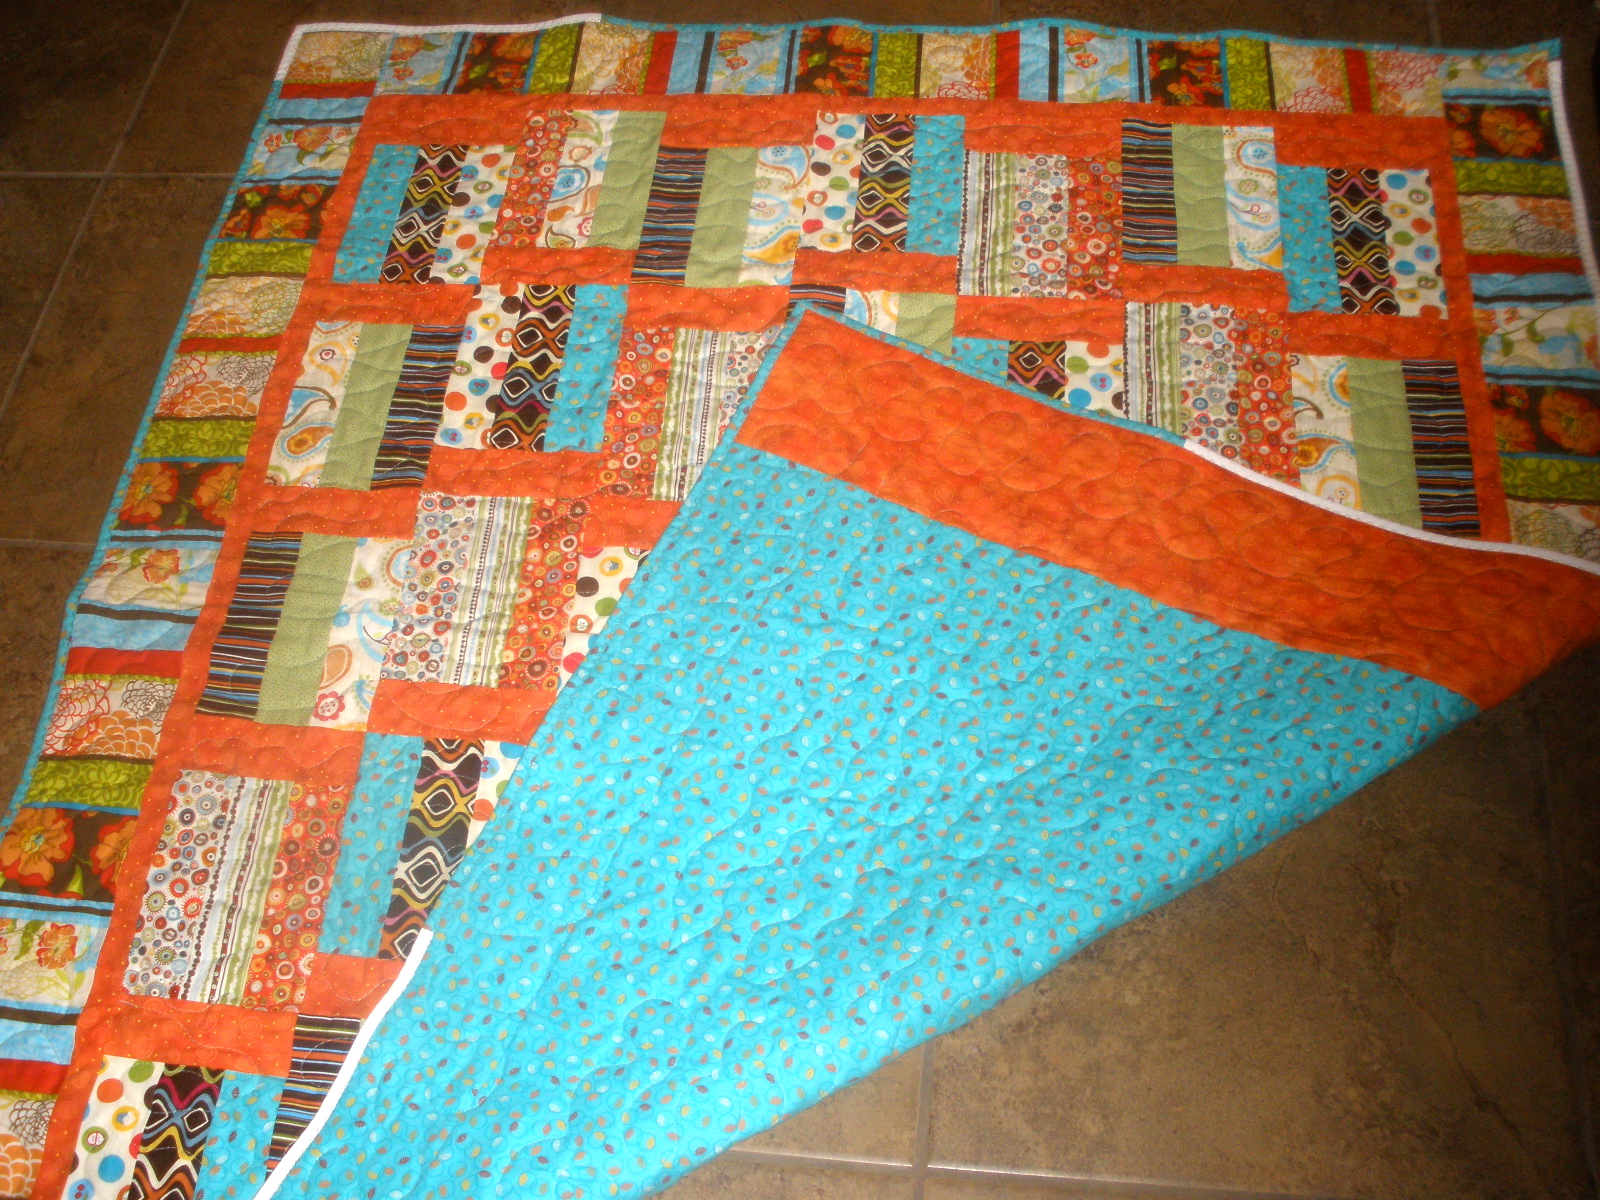
Sunshine Quilt


I made this quilt for my sister-in-law who lives in California. I thought these colors fit the California lifestyle perfectly. Hopefully I am right! This pattern is called "Sunshine Makes Me Happy" by Donna Kinsey in her book, Strip Happy: Quilting on a Roll. I LOVE every single pattern this book has and have made most all of them! I highly recommend it; especially for beginner sewers. 


Pros of this Pattern:
I've done this pattern multiple times which means I really like it! It's quick and simple (of which I am ALL about).

You can make this with a jelly roll.


Cons of this Pattern:
For a lap quilt size, the backing takes a lot of fabric if you want it to be all the same. I decided to piece mine together so I wouldn't have to spend too much money.

I wish this made a bigger quilt!

Monday, July 25, 2011

Multi-Colored Quilt


The pattern for this quilt came from "A Gentleman's Haven Quilt" by Pearl Krush in her quilting book, Quilting for the Men in Your Life. I do want to note, however, that the colors I used are nothing like what Pearl Krush used and therefore I wouldn't say this is a man's quilt! I made it for a girl in her teens actually. She wanted rainbow colors. 
The main idea of this quilt is that you have strips of three fabrics and one on the outside is always the same color so you can make a stair-step running through your quilt. I chose the color green for my "stair-step" fabric but did different variations of it so it's not as obvious as the pattern intends. 


Pros of the Pattern:
This makes a good quilt out of scraps of fabric.

It was quick and easy to put together; all of the blocks matched up nicely. 

As you can see, you can put your own colors into the pattern and it will turn out just as great. I loved how vibrant this turned out and I'm not the biggest fan of rainbow colored quilts :) . 

Cons of the Pattern:
The only con I can think of was that cutting took awhile, but that was my fault in the long run because I made this mostly out of scraps!