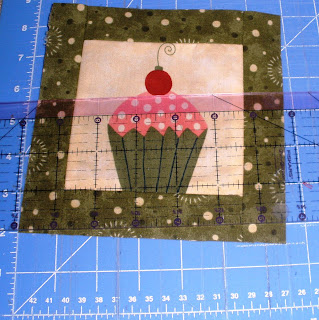
Here is what I am working on with my Crazy Eight Reindeer Panel quilt - tilted squares! It adds a great "twist" to your quilt.
1. Add a border fabric to your middle square. (I added honey bun strips). After adding the border, make sure each block is the same size. In my case, I made all of mine 6 1/2".
2. On my cutting board, I made a chalk mark where the 1/2" line would be since there is none. Then, I lined my bottom left corner with the 2" mark, and my bottom right corner on the 1/2" chalk mark.
3. Mark all of your cut lines before cutting. Just remember the goal is to have straight lines even though the square in the middle is becoming tilted! I use my ruler as a guide from the bottom left corner and along the 2" line. See how it creates a straight line? It's also important here to mark before you cut because then you can see how your quilt block will come out before any cutting is done.
4. Below are all of my chalk marks. I put the ruler on the right side to show how you would line it up in order to mark all sides. Basically you start from the corner and go straight! For instance, I used the 2" line on the bottom, the 6 1/2" line on the right side, the 8" line on the top, and the 1/2" line for the left side.
5. Now cut, and if you started out with a 6 1/2" square like me, you should now have a 6" x 6" finished square.
These make for very whimsical and cute quilting blocks! You can view them within a quilt here.


