Monday, March 28, 2011

Tutorial: Bandana Dress/Shirt

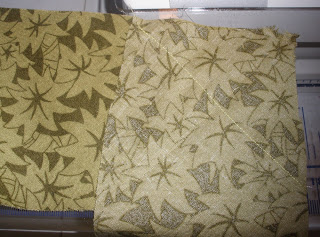
The Bandana Dress!
A simple dress for up to age 3, and then it doubles as a shirt!


Supplies:
1. Spool of ribbon (ideally 7/8" wide)
2. 2 matching bandanas


 How to make this:
1. Fold bandana and pin at 1 3/8" (to allow a seam) and sew. If you'd like to put ribbon along the bottom of your dress, do that now. 


2.Place bandanas right side together and pin 6" down from the top.  

 3. Sew the bandana from the bottom of the dress to where you inserted the pin. This picture shows the opposite but I learned on my second dress to do it this way because then the bottom matches up. Sew on the other side as well.

4. Iron down the seams.
5. Turn right side out.

6. Thread your ribbon through the sewn down folded fabric. I used 39" of ribbon for each bandana. Singe the edges of your ribbon if needed to prevent fraying.

7. Push together the fabric with the ribbon inside until it is about 7" long. This is the neckline. Make sure the ribbon showing is the same length on each side of the neckline and sew down the ribbon. This allows the neckline to stay bunched together, the ribbon to not come out of the dress when it is washed, and for the ribbon to stay the same length on each side. Sew down the ribbon on all four points where the ribbon comes out of the fold. 

Here's my model! She wanted the camera so I couldn't quite get a smile out of her.   
If you'd like to make a flower for your dress/shirt, you can use this flower option, or take the ribbon and sew straight down the middle with the largest stitch your machine can do and follow the same instructions.

Monday, March 21, 2011

Quick-Tip: Pin Cushions


VS.

In my personal opinion, tomato-shaped pin cushions that are available at the store aren't really that cute. If it only depended on looks, I'd have all homemade pin cushions! However, there is one BIG difference that I'd like to make note of between these two pin cushions. The difference is that the tomato has particles inside which sharpen your pins every time you put them in there, whereas homemade pin cushions cannot provide that luxury! 

I'll let you decide what you'd like to do with this information! A good compromise might be to have a tomato as well as a homemade pin cushion (if you have that many  pins). 


Wednesday, March 16, 2011

"Cam" Tie for Little Boys - Tutorial

My friend and I call these "Cam" ties because they look like the shirts Cameron wears on the TV show Modern Family. We think they're pretty fun. You can also cut this pattern down to make a tie for an infant if you trust yourself enough to try. I don't think it'd be that hard.


I had the opportunity to make this tie from The Purl Bee. It came out cute but I would definitely machine sew it rather than by hand. It took myself and a friend a good three hours from start to finish using that tutorial! We didn't do any interfacing and the ties work just fine so you can decide if you want to or not. I'd use it if you decide to make a tie out of silk though!

Using the pattern from The Purl Bee's website, here is how I would put the tie together:

1. First off, follow the directions on The Purl Bee's website, but when you sew, do these steps below.
2. Put the right sides together and sew:

3. Machine sew across to join the two tie parts. Right sides together again:

4. When ironing your tie before the final step, split the seam in half and iron it down:

 5. Fold tie in half and sew down on the opposite side of the point only. Make sure you backstitch. I also set my fabric to follow the 10 line on my sewing machine (under the foot). That is about a half inch seam. That will make up for not hand stitching it. 

Ta Da! 


Friday, March 4, 2011

As Of Late

I apologize for my lack of "posts".... as of late I have been planning birthdays (for my daughter and husband) and  acting as my husband's personal secretary helping him fill out job applications for after he graduates college! All applications are in and birthdays have past, so I'm trying to get back into the creative aspect of my life. Wish me luck! Soon enough I'll be posting fun things to make and do.