Showing posts with label quilting. Show all posts

Monday, November 28, 2011

Quick-Tip: How Much Fabric For Binding A Quilt?

I always use 2 1/2" wide strips for binding my quilts. 
Here's a formula to figure out how much fabric to purchase to bind your, well, any project that requires binding really! 

(width of quilt in inches + length of quilt in inches) times 2 + 24" = amount of inches for total binding. 
Divide the total by 40 and round up, that = the total amount of strips. Times that total by 2.5 and that = the amount of inches of fabric needed.

Make sense? Here's another way to look at it:

(width of quilt in inches + length of quilt in inches) x 2, + 24" = amount of inches for total binding.
Amount of inches for total binding divided by 40 = the total amount of strips to cut (round this # up if a decimal). 
(Amount of strips to cut) x 2.5" = amount of inches of fabric needed

Monday, October 3, 2011

Tutorial: Eight-Pointed Star Block Pattern

This quilt block will end up measuring 6"x6". I will be referring to the inner fabric as your "star" fabric, and the outer as your "square" fabric. Sew with a 1/4" seam. 

This is a great block for scraps! 


Steps:

1. Cut two 2 7/8" squares from your star fabric and then cut once diagonally across on each. I used more than one fabric for my star because I only had honey bun strips. You can use one fabric!

2. Cut one 3 1/4" square from your star fabric and then cut it diagonally twice to make four triangles.

3. Cut one 2 1/2" square from your star fabric.

4. Cut four 2 1/2" squares from your square fabric.

5. Cut one 3 1/4" square from your square fabric and cut it diagonally twice to create four triangles. 

6. Time to sew! Sew your star and square quarter triangles (from steps 2 & 4) on the top right side as shown in the picture below. Be sure to place your fabrics right sides together with the square fabric on top. If you don't do this correctly your star won't come out right! Don't worry though, I did some unstitching too... After sewing, open the triangles and iron open the seam. Repeat this step for all of your quarter triangles.

7. Take your triangle from step 6 and sew onto it a half triangle from your star fabric (from step 1). Sew with right sides together, on the long side of the triangle. Iron open. Repeat this step to make four star-point squares. 

8. Here are what your star-point squares will look like: 

9. Start sewing your rows together. First row: square fabric 2 1/2" square, star-point square, and a square fabric 2 1/2" square again. Iron.

10. Second row: star-point square, star fabric 2 1/2" square, and star-point square again. Iron.

11. Third row: 2 1/2" square fabric, star-point square, and 2 1/2" square fabric again. Iron.

12. Now you have three rows that, when you place them above and below one another, should look like this:

13. Sew each of your rows together, remembering to line up the seams so your star comes out as beautifully as possible! Iron and straighten out your edges (by cutting) to make the block exactly 6"x6". 

Saturday, August 13, 2011

Quick-Tip: Preparing Fabric for Cutting


If you are interested in cutting your fabric straight (especially for strips), use this tip to help you do so:

First, fold your fabric in half with the salvage edges together, as well as the already cut edges from the fabric store. Line up the edges that have already been cut and don't worry about the salvage edges. 

 Now fold the fabric again and lay it over the top of your seams so you don't get distracted by it. 

Put your ruler over the fabric and line it up to make sure it is straight on either side. For example, in this picture I lined up the ruler at one inch on the top and half an inch on the bottom. No matter what, you'll want your fabric to be the same length from one side of the ruler to the other to show your fabric is straight. Go ahead and cut!


Monday, August 1, 2011

Sunshine Quilt


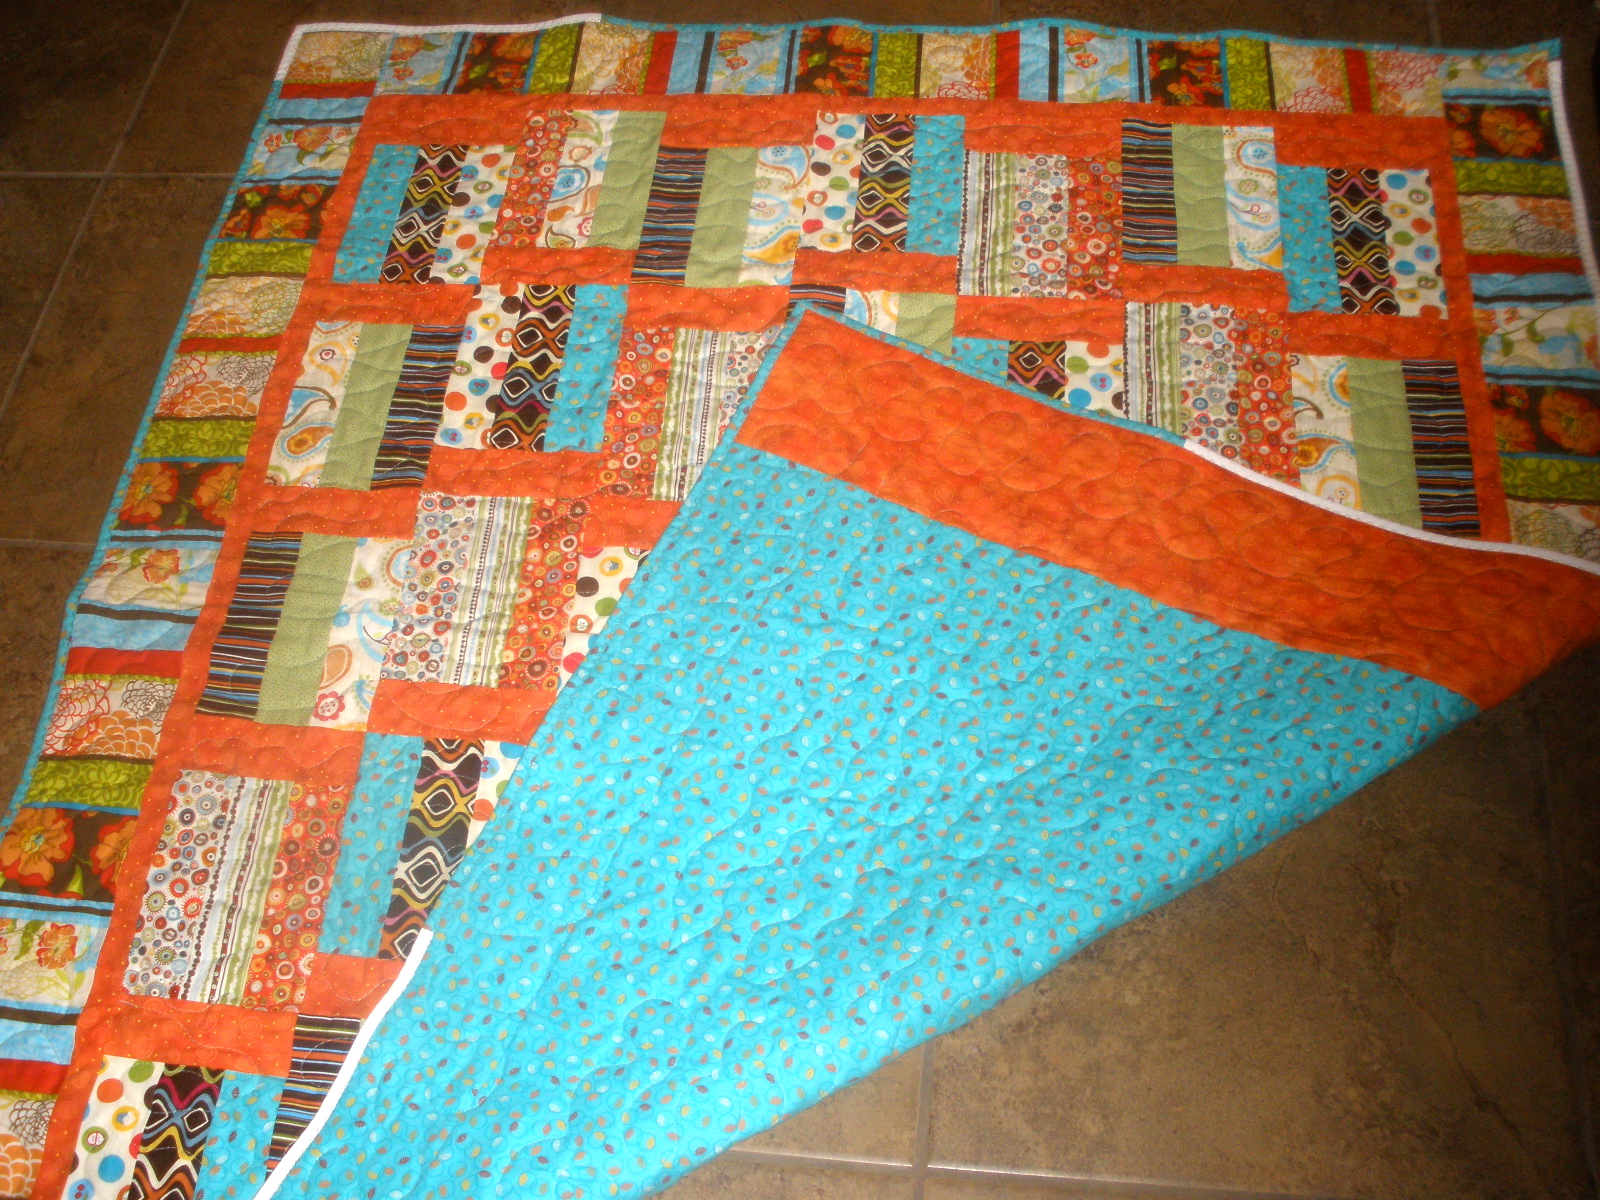
I made this quilt for my sister-in-law who lives in California. I thought these colors fit the California lifestyle perfectly. Hopefully I am right! This pattern is called "Sunshine Makes Me Happy" by Donna Kinsey in her book, Strip Happy: Quilting on a Roll. I LOVE every single pattern this book has and have made most all of them! I highly recommend it; especially for beginner sewers. 


Pros of this Pattern:
I've done this pattern multiple times which means I really like it! It's quick and simple (of which I am ALL about).

You can make this with a jelly roll.


Cons of this Pattern:
For a lap quilt size, the backing takes a lot of fabric if you want it to be all the same. I decided to piece mine together so I wouldn't have to spend too much money.

I wish this made a bigger quilt!

Monday, July 25, 2011

Multi-Colored Quilt


The pattern for this quilt came from "A Gentleman's Haven Quilt" by Pearl Krush in her quilting book, Quilting for the Men in Your Life. I do want to note, however, that the colors I used are nothing like what Pearl Krush used and therefore I wouldn't say this is a man's quilt! I made it for a girl in her teens actually. She wanted rainbow colors. 
The main idea of this quilt is that you have strips of three fabrics and one on the outside is always the same color so you can make a stair-step running through your quilt. I chose the color green for my "stair-step" fabric but did different variations of it so it's not as obvious as the pattern intends. 


Pros of the Pattern:
This makes a good quilt out of scraps of fabric.

It was quick and easy to put together; all of the blocks matched up nicely. 

As you can see, you can put your own colors into the pattern and it will turn out just as great. I loved how vibrant this turned out and I'm not the biggest fan of rainbow colored quilts :) . 

Cons of the Pattern:
The only con I can think of was that cutting took awhile, but that was my fault in the long run because I made this mostly out of scraps! 

Thursday, July 21, 2011

Inspiration


From the colors to the pattern...I really want to make this quilt! Who's with me? 

Monday, July 18, 2011

"Sweetwater" Quilt

I have been very busy making quilts for a customer of mine! (This quilt is one of two just this month!) Hence the reason for so many quilt posts. This pattern is called "Sweetwater" by Debbie Outlaw, provided to me through Fons & Porter's Easy Quilts. Had I not been making this for someone else, my husband said he really wanted to claim it! (Thanks hub). The colors I used are black, green, ivory, white, and a touch of light yellow. 


Pros of the pattern: 
Easy, simple, and quick assembly. 

The pattern is easy to understand and can be made with primarily fat quarters. 

The pattern also gave size options which told me how much of each color of fabric/fat quarters I would need to make a twin, full, or queen size quilt. I was VERY impressed with that!

Cons of the pattern:
Assembly could take longer if you follow the pattern instructions and assemble the quilt first by doing blocks, and then sewing rows together. I simply sewed together rows after laying out my fabrics and the quilt came together just as nicely but faster. 

Although this pattern told me how many fat quarters I would need to make the rectangular pieces, it was off. I needed double the amount the pattern told me! So if you decide to make this; you'll want double the amount of fat quarters it says to make for the cream and beige fabrics. Luckily I had some scrap fabric that provided me with enough to make do. 

Monday, July 11, 2011

Dinosaur Baby Quilt

Here's a quilt I finished a while ago for my sister-in-law's baby boy! I got the dinosaur fabric at Wal Mart, and this pattern is GREAT for showing off larger print fabrics. The quilt is the same pattern as my previously shown "You Go Cowgirl" quilt. You can go there to see where I got the pattern from. It's been one of the best quilts I've put together lately!

Click on the photo to get a bigger picture. 


Tuesday, May 31, 2011

Water's Edge Quilt

This is Water's Edge, designed by Marion Patterson in the quilting book, Simple Stitches Quilting. I did add the borders around it though. This quilt is black, white, grey, and purple. I totally changed the color scheme so that would be why this quilt doesn't really look like the "Water's Edge"! 

The front:


The back:

I only have one complaint for this pattern: if you don't use a layer cake  (40 10" squares of fabric pre-cut) it is best to lay out the pattern as you cut your fabric and the pieces that lay horizontally you'll want to cut a 1/4" shorter. 
You can purchase this quilting book which has "18 projects for the new quilter"! I just received it as a gift and have found many patterns I am anxious to make. 
Below is a picture of the book as well as a link to it on Amazon:

Monday, May 9, 2011

Quick-Tip: Batting


I have been purchasing the cheapest batting at JoAnn's - you know, the one they have rolled up and it is normally $12.99, but with your 40% off coupon it is a steal of a deal? I'm sorry I don't have details, apparently I need to pay more attention to the batting I am buying! Anyway, this particular batting was part cotton and polyester as well as about a half inch thick. It worked well enough for me until one day I decided to buy a thinner batting for a baby blanket. (Quick-tip within a quick-tip: thinner batting is nicer for baby blankets because it is easier for the mom to wrap the baby up in the blanket. Something I determined after having my first child.) 

So I bought something like this:


This batting is more like 1/4" thick and made of cotton. When I went to do the stippling on the quilt it was 10 times easier, my fabric (top and bottom) didn't bunch and create folds, and it was easier to trim up the edges for binding. When it came time to bind the quilt, I couldn't believe how much easier that was to do! I had no problems at all! Plus my binding didn't have any folds in it and my corners turned out perfect. 

I've been seriously quilting for 3 years now and I have always had some type of issue when it came to binding. I couldn't believe the difference a change it batting made. So now I will be changing my batting purchasing habits! 

Monday, November 8, 2010

Quilting Block: Tilted Squares

Here is what I am working on with my Crazy Eight Reindeer Panel quilt - tilted squares! It adds a great "twist" to your quilt.

1. Add a border fabric to your middle square. (I added honey bun strips). After adding the border, make sure each block is the same size. In my case, I made all of mine 6 1/2". 

2. On my cutting board, I made a chalk mark where the 1/2" line would be since there is none. Then, I lined my bottom left corner with the 2" mark, and my bottom right corner on the 1/2" chalk mark. 

3. Mark all of your cut lines before cutting. Just remember the goal is to have straight lines even though the square in the middle is becoming tilted! I use my ruler as a guide from the bottom left corner and along the 2" line. See how it creates a straight line? It's also important here to mark before you cut because then you can see how your quilt block will come out before any cutting is done.

4. Below are all of my chalk marks. I put the ruler on the right side to show how you would line it up in order to mark all sides. Basically you start from the corner and go straight! For instance, I used the 2" line on the bottom, the 6 1/2" line on the right side, the 8" line on the top, and the 1/2" line for the left side. 

5. Now cut, and if you started out with a 6 1/2" square like me, you should now have a 6" x 6" finished square. 

These make for very whimsical and cute quilting blocks! You can view them within a quilt here.

Saturday, November 6, 2010

Add A Decorative Touch To Your Quilt

I bought this panel (awhile ago) called, "Crazy Eight Reindeer Panel". I saw the quilt put together and LOVED this detail: stitching! As you can see, I added snowflakes falling down from the sky. I also outlined a few items (like the striped blue hat below) to give the panel a 3D affect as well as to help hide the fact that this is indeed a panel! I'm not a huge fan of them, but this one is really cute. You can view the whole panel here. It comes with the large picture with the reindeer, and all of the squares you see with Christmas decor (ie. holly, Christmas tree, snowman, ornament, etc.) I plan to make up my own version of this quilt and have some cute quilting block ideas for you, so check back!


To stitch these falling snowflakes in, along with outlining items on the panel, I used cross stitch thread (all strands) and a needle. 

Tuesday, September 28, 2010

Quick-Tip: Stippling


A good way to keep a firm grim on your fabric/quilt while stippling is to wear gardening gloves. There are special quilting gloves you can buy, but this is the cheaper (and just as good) alternative!