Monday, July 25, 2011

Multi-Colored Quilt


The pattern for this quilt came from "A Gentleman's Haven Quilt" by Pearl Krush in her quilting book, Quilting for the Men in Your Life. I do want to note, however, that the colors I used are nothing like what Pearl Krush used and therefore I wouldn't say this is a man's quilt! I made it for a girl in her teens actually. She wanted rainbow colors. 
The main idea of this quilt is that you have strips of three fabrics and one on the outside is always the same color so you can make a stair-step running through your quilt. I chose the color green for my "stair-step" fabric but did different variations of it so it's not as obvious as the pattern intends. 


Pros of the Pattern:
This makes a good quilt out of scraps of fabric.

It was quick and easy to put together; all of the blocks matched up nicely. 

As you can see, you can put your own colors into the pattern and it will turn out just as great. I loved how vibrant this turned out and I'm not the biggest fan of rainbow colored quilts :) . 

Cons of the Pattern:
The only con I can think of was that cutting took awhile, but that was my fault in the long run because I made this mostly out of scraps! 

Thursday, July 21, 2011

Inspiration


From the colors to the pattern...I really want to make this quilt! Who's with me? 

Monday, July 18, 2011

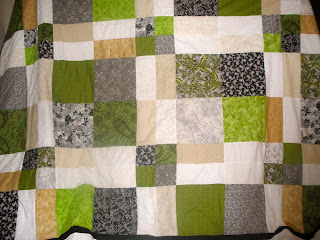
"Sweetwater" Quilt

I have been very busy making quilts for a customer of mine! (This quilt is one of two just this month!) Hence the reason for so many quilt posts. This pattern is called "Sweetwater" by Debbie Outlaw, provided to me through Fons & Porter's Easy Quilts. Had I not been making this for someone else, my husband said he really wanted to claim it! (Thanks hub). The colors I used are black, green, ivory, white, and a touch of light yellow. 


Pros of the pattern: 
Easy, simple, and quick assembly. 

The pattern is easy to understand and can be made with primarily fat quarters. 

The pattern also gave size options which told me how much of each color of fabric/fat quarters I would need to make a twin, full, or queen size quilt. I was VERY impressed with that!

Cons of the pattern:
Assembly could take longer if you follow the pattern instructions and assemble the quilt first by doing blocks, and then sewing rows together. I simply sewed together rows after laying out my fabrics and the quilt came together just as nicely but faster. 

Although this pattern told me how many fat quarters I would need to make the rectangular pieces, it was off. I needed double the amount the pattern told me! So if you decide to make this; you'll want double the amount of fat quarters it says to make for the cream and beige fabrics. Luckily I had some scrap fabric that provided me with enough to make do. 

Monday, July 11, 2011

Dinosaur Baby Quilt

Here's a quilt I finished a while ago for my sister-in-law's baby boy! I got the dinosaur fabric at Wal Mart, and this pattern is GREAT for showing off larger print fabrics. The quilt is the same pattern as my previously shown "You Go Cowgirl" quilt. You can go there to see where I got the pattern from. It's been one of the best quilts I've put together lately!

Click on the photo to get a bigger picture. 


Monday, July 4, 2011

Bits of Fabric? Use Cover Buttons!

I have been known to throw away little bits of fabric because I think, "There's no way I'm going to sew something of such a small size." But now question myself before doing this. The reason being that I have just discovered the versatility and simplicity of cover buttons!

With about two square inches of fabric, I can make:
-earrings
-rings
-magnets
-hair decor (clips, flower centers, etc.)

So here's how the cover button works:
Grab some fabric (there's a pattern on the back of the package your cover buttons come in).

Place the cover button on the back of the fabric:

Put the fabric and cover button into your mold (comes with the package of buttons).

Trim the fabric down so there's about 1/4" sticking out.

If you want to make anything other than a button - you'll want to use some needle nose pliers to remove the hook on the back.

This is what the back will look like when the hook is pulled out.

Now fold in the fabric & place the back on (rough side up).

Sorry this picture is blurry! You'll put the blue piece on top to push the back into the top of the button. However I must say that I used the bottom of the needle nose pliers and that worked faster and easier than this blue piece! (It comes in the package as well)

Here's what it'll look like when all pushed in:

Take out the button and wah lah! A cute cover button that I am going to make into a magnet!

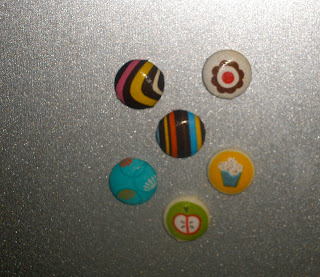
Here's all the magnets I made with cover buttons:

More magnets:

Make rings:

Make earrings: